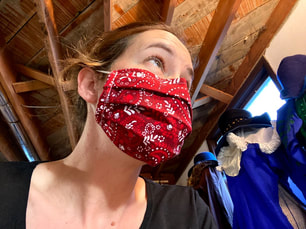
Masks!In making masks to help fight Covid-19, I watched a bunch of how-to videos and came up with a pattern I preferred. There are plenty of different ones out there that are great, this one is just mine and I hope it can help you. Feel free to contact me if you have questions, and remember to take pics of what you make and share them!
|
|
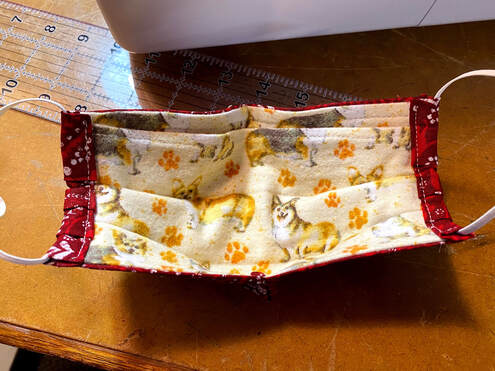
Use your favorite patterned cotton fabric, unless you can use corgi fabric, then always use corgi fabric! :D
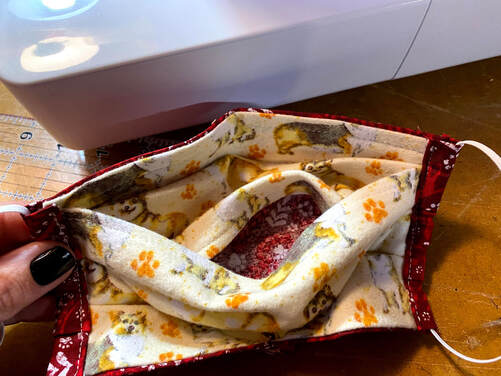
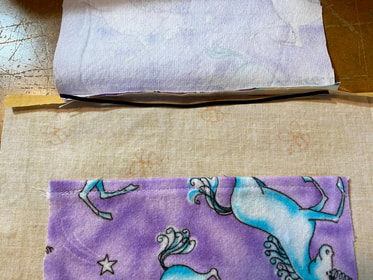
Pull the layers apart to put the filter in between the main fabric and lining. Works like a charm!
|
Design The initial design follows the CDC's released pattern that is a simple folded fabric with elastic over the ears and a space between layers for a filter. Check out the video I started from here- DIY Covid-19 Fabric Mask w/ filter pocket sewing tutorial
|
How-To
First cut out your Main piece 9.5" x 7.5" out of cotton. I had a plethora of printed cotton hanging around to make them colorful. Then cut out two Lining pieces 6.5" x 5.25" (the pic says 7", ignore that we updated it after making a few). I used cotton flannel to be softer on the face. The slight overlap provides more layers even if you don't add a filter.


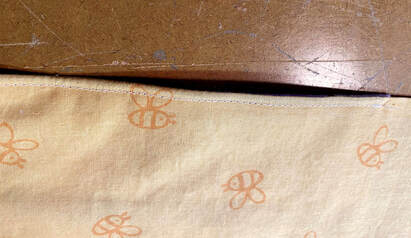
Then hem one of the 6.5" sides of both your lining pieces. Direction only matters if you have a pattern (like I did with my corgis, but really it doesn't matter). I then pin them to the main piece, right sides together. I try to streamline my process by pinning all four seams and then sewing each of them. Sew the two linings to the main piece , the 6.5" non-hemmed side to the 9.5" side of the Main, centering the lining in the middle of the Main piece. Repeat on the other side of the Main with the other lining piece. The linings will overlap each other.
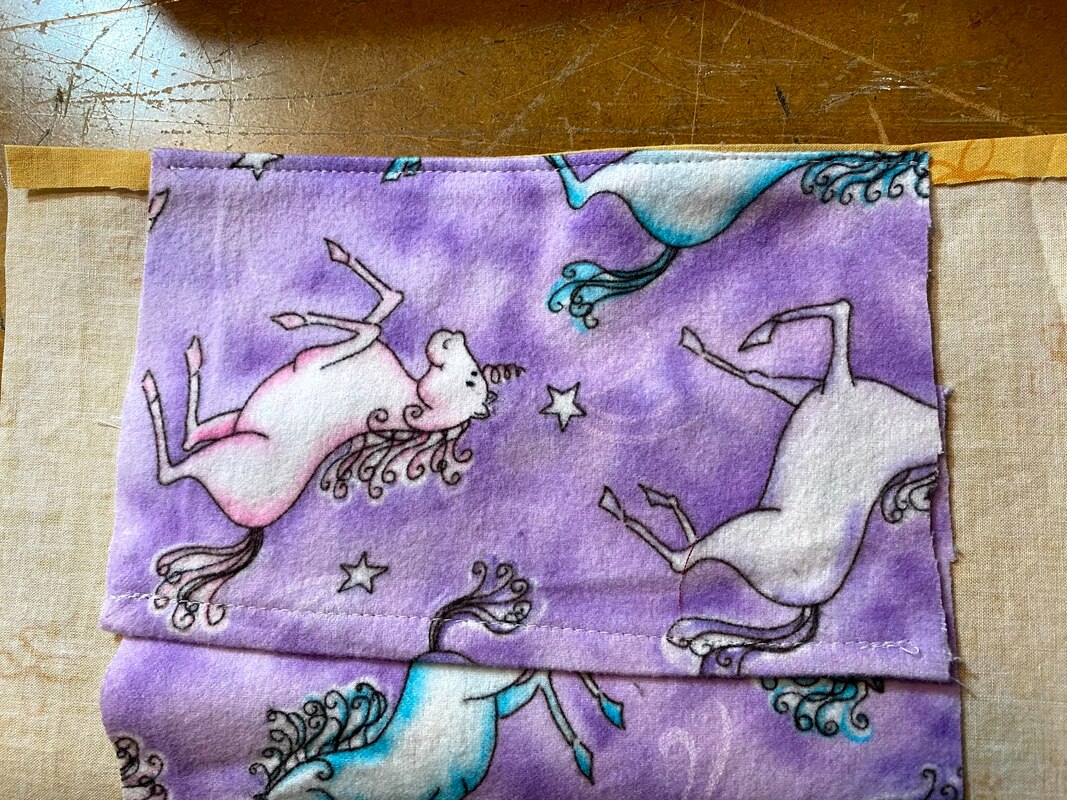
Then, IRON! The iron is your friend. Iron your seams and fold the lining in, so now wrong sides are together and the linings overlap.
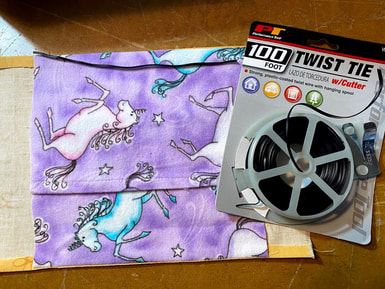
Very Twisty!- add a twist tie to the nose to make it flex to your face. I initially used twist ties from bread bags and packages of garbage sacks, but they were mainly paper coated. I stumbled on this roll at the local car parts shop and it worked BRILLIANTLY! Also, it only cost $4 for 100' and had a handy little cutter on it. Amazon has some too, and garden ties should work good also, just make sure they are plastic coated so the masks can be washed without the tie dissolving. I cut a piece about 6" long and tucked it under the seam at the top of my mask (choose either side as your top, only having a pattern would make this matter).
|

|
Sew along the tie- stitch closely to the tucked in tie along the top of the mask. No you can't ruin it, and it doesn't have to be touching, just close. It'll look like a stay-stitch along the top of your mask from the outside afterwards. I go the entire length of the lining just to be safe, although my wire is a little shorter than that.
|
|
Time for Pleats! I hate pleats. These masks have three in them. There is no real good way to pin them to sew, I just lay the mask face up and grab about 1/2" inch on either side and lift it up, then fold it down. That's the the first fold, then while holding the first one, pick up another 1/2", lay it down, and then the third. I then iron the CRAP out of it, using my left hand to hold the folds down until I can slap the iron down on top. Then turn the mask over and iron the crap outta that side too. After that you shouldn't need pins or clips to hold them together, you can bring it to your sewing machine and sew as close to the lining's edge as you can on both ends. Sew carefully so the pleats don't un-pleat apart as you sew down them. It may take you a few grabs to get the pleats right, you are grabbing both the main fabric and the linings underneath, but keep trying it gets easier. Promise. The lining may not be even on the ends after you sew the pleats down, don't fret, it's not a big deal.


Folding the ends- the main fabric sticking out at the ends gets folded twice to make the gap your elastic slides though to loop over the ears. (See the update for ties below) Fold it once very close to itself, iron that. Then fold it again and try to have the fold meet the stitch line that held your pleat down. It doesn't have to be exact. Remember, anyone looking that closely once it's on, shouldn't be. Repeat on both sides. You're 90% done!


Home Stretch! - cut two elastic pieces 10.5" long (See the Mod #2 version below for other options) and thread them through the sides. I used a safety pin to guide them through, or you can use a threader if you have one. I made mine long so I can tie it in a knot and put the knot into the mask to hide it. It's just a fussy part, keep at it. You can also make them about 1/2" shorter and stitch them together if you'd like. The thinner the elastic the better, but use whatever you've got. Mine were between 1/4" and 3/8" wide elastic. Non-latex would be best, but again, whatever you've got or can find. SEE UPDATE BELOW FOR TIE OPTIONS AND NEW BIAS TAPE/ELASTIC TIES.
Final Touches- try one on and you'll see they expand down over your chin when you pull the pleats apart. Squeeze the tie at the nose and it will fit closer. If it gaps along the bottom (all of mine did on me) you can pinch a small amount and put a dart in the bottom. Its a small stitch making a triangle at the bottom center with the folded part in towards the lining so it's hidden. (IMPORTANT- if you are putting ties on instead of elastic, make your dart smaller. OR put the ties on and try it on yourself and see if it still needs a dart. Larger faces may not need it, smaller faces will)
VOILA! you've made a great little mask that can help someone who really needs it. Ask your friends if they need one, you never know who might, and consider giving some to nursing homes and teachers! They can use these even after this current crisis. Also, we found here that they are not only great at helping with the sick, they also really help with high-allergy type work like mowing, burning and weed cutting, which we do on the ranch a lot. And THANKS!


UPDATE- adding ties
Elastic is getting scarce and having these masks pull on your ears can be a pain (literally). We experimented with adding ties to this pattern (because I'm lazy and a creature of habit and don't want to learn a new pattern) and it worked fine. I feel the ties make the mask gap more, but I think that's the nature of the beast and that some side gaping will happen with all masks of this nature. Ties will add a bit to your production since it can take about 15" per tie (x4) and if you don't already have something, you'll need to make it. Long strips of cotton folded in bias tape or store bought bias works great, ribbon would work if it's not too slippery (think grosgrain). If you an SCA person, lucets! (braided cotton cord), I bet they would be great (I'll try some tomorrow). Here are some pics of the one I made today with ties. Don't judge my appearance, I'm day who-knows-what with school-at-home kids now. I'm surprised I even leave my bedroom for fear of what they will get into next. Happy Sewing!
Adding Ties- cut EITHER four 15" ties and attach to each of the four corners of your mask in the space made for the elastic OR cut two 34" ties and run them through the mask's elastic openings on each side. If you have enough tie material, the two longer ones are easier than placing each tie on each corner, especially if you are making many of these. Put a few stitches where the tie is in the mask corner to keep it secured. Stitch the unattached end of each tie to make sure it doesn't fray when it's washed. IMPORTANT- when making the dart in the bottom of your mask, make it smaller if you are attaching ties. The dart is there to help the mask hug your chin and the bottom ties help with that some already. If this is for a person with a larger face, leave the dart out. Try a few on and see what you think.
A NOTE ON WEARING THESE WITH TIES- it's not as easy to put on. When you first put the mask on and tie around the back of your head the mask will ride up on your nose and eyes. Don't fret, tie the top ties, then push the mask down and pinch the nose twist tie and it will form to your nose, then tie the bottom ties and it will stay down.
A NOTE ON WEARING THESE WITH TIES- it's not as easy to put on. When you first put the mask on and tie around the back of your head the mask will ride up on your nose and eyes. Don't fret, tie the top ties, then push the mask down and pinch the nose twist tie and it will form to your nose, then tie the bottom ties and it will stay down.


The Retrofit! (aka, Mod #2)
Ok, so here at the Ranch Sweat Shop (tM) we're constantly trying to find ways to make these masks a little better. Most of us will never have to wear them to the extent a nurse or hospital worker will have to, and understanding that these are not meant to be comfortable, they can (will) bother you and hurt your ears or be hard to breath in, needs to be a reality. That being said, we can try to make them somewhat better. So here is what we came up with concerning stretchy ties-
The Hybrid- Ties and elastic together:
What we did was make a tie that combined elastic with some bias tape to help cut down the amount of tape and elastic only needed and still have the stretch to stay around the head and off the ears. Check out the pics below to see what I mean:
The Hybrid- Ties and elastic together:
What we did was make a tie that combined elastic with some bias tape to help cut down the amount of tape and elastic only needed and still have the stretch to stay around the head and off the ears. Check out the pics below to see what I mean:


Here's how to do it:
-Make your mask the same as above until you get to the elastic. Cut one long piece 18" long.
-Cut a piece of bias tape 10" long (or ribbon, or strip of fabric like your main mask fabric, folded)
- Looking at the front of the mask, thread the elastic through the sides from the top left down to the bottom, continue across the bottom of the mask and back up through the right side. The elastic will have the two ends across the top and a connected loop of elastic at the bottom.
-Take your bias tape and attach it to the two loose ends of the elastic at the top. You are sandwiching the elastic end into the end of the bias tape. Remember to sew down your bias tape to close it. I start on one end with a bunch of stitches, do down the length of the bias tape, and then attach the other piece of elastic. See the first picture above for an example.
-Don't put a dart in the bottom of these- we have found it makes them too small.
**Side Note** if you have a mask with side channels like this that has only ear elastic you can cut the elastic loops, sew them together at one end, thread them through the side and attach a piece of bias tape or ribbon yourself to make them like these Mod #2's. Measure your new length of elastic that you sew together and if it's less than 18" long, make your bias tape longer to accommodate the difference. Then follow
And again, Viola! you have a mask and this one is a bit more snug and not so much pressure on the ears. We found this one fit everyone in the house, and my son tried to steal it even with the pink and unicorns because it was more comfy than his. However, these are still not what I could consider truly comfortable to wear, they push a bit more on your nose and mouth, since your nose is now the opposite point the elastic is stretching from. But still, it works. I like it because it's a good way to utilize both elastic and bias tape while using only some of each instead of almost a yard of bias tape per mask for ties or all elastic and very hard on the ears.
I hope this helped you! Feel free to email me if you have questions or send me a pic of your masks! I'd love to see them [email protected]. And below are my two other partners in crime, my sweat shop employees, working for no pay other than strong coffee, basement escapism and something to keep them occupied- My Inlaws Margie & Clay. Who, incidentally, are also the main reason our little quarantined family are making all of these these- to help everyone else keep them and other immune compromised people like them safe.
